Originally posted on the Unreal Engine blog.
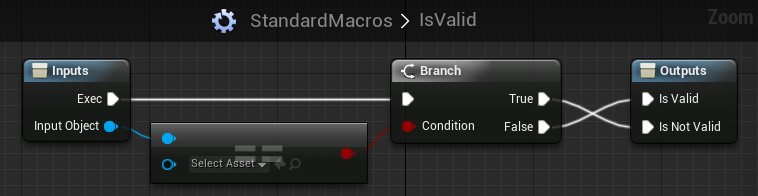
A Blueprint Macro lets you reuse a set of nodes over and over, and can be created in any blueprint (using the Add Macro button on the ‘My Blueprint’ toolbar). You can also turn a selection into a macro by right-clicking on a selected node and using the ‘Collapse to Macro’ option. A macro works a lot like a collapsed graph; you can define arbitrary inputs and outputs, which will show up as pins whenever you place a macro instance. Here is an example of a macro named IsValid, which checks to see if an object pin is valid or not:
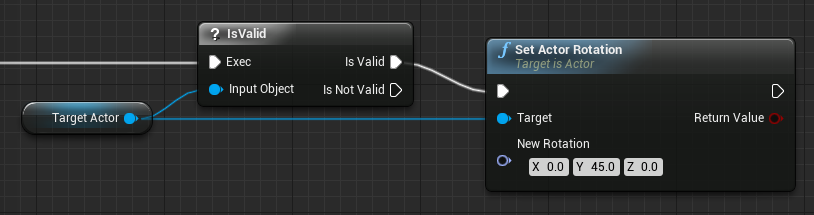
This macro can then be placed as an instance in another graph as ‘shorthand’ for the nodes it contains, allowing you to reuse code and hide complexity:
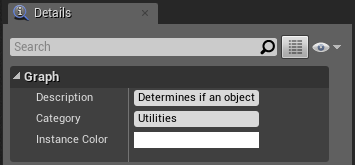
Be sure to set the Description and Category on your macros. The description will show up as part of the tooltip on node instances, helping you remember what the macro is doing without having to open it up (though you can always peer inside by double-clicking on an instance). The category defines where the macro shows up in the graph action menu. You can also pick an instance color, which controls the color of the node title bar on instances (for example, we use white to indicate flow control nodes, matching the color of execution pins and wires).
Macro Libraries
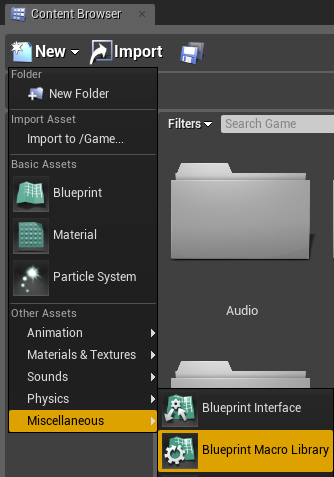
You can add macros to any blueprint, but normally they are only available for use in that Blueprint. In order to share a macro across many blueprints, you can add them to a Macro Library. There are a couple of built-in Macro Libraries in the Engine content directory (many features such as for loops are actually built using macros), but you should never edit content in the engine yourself, since future engine updates will stomp on your changes. Instead, create a Macro Library asset for your project using the content browser:
You’ll be asked to pick a parent class for your macro library just like a regular blueprint (Actor is a safe choice if you’re not sure what this means). This allows macros in the library to access variables and functions declared in the parent class as if they were in scope. For example, macros in a library based on Pawn can call GetController without being passed a Pawn, and they will only show up as options in the context menu for Blueprints based on Pawn or a more derived class like Character.
There’s also a tutorial that will walk you thru the Macro Library editor interface the first time you make one (it can be accessed again from the Help menu if you’ve already skipped it).