Managing complexity in Blueprints

Originally posted on the Unreal Engine blog.

As you build larger projects with Blueprints, it’s easy to end up with an overwhelming sea of nodes.  However, we’ve built in a number of different encapsulation and code reuse mechanisms to help you battle the chaos.

To encapsulate something is “to show or express the main idea or quality of (something) in a brief way”; in other words we can hide a complex sequence of nodes with a simple stand-in that conveys the same meaning or idea.  You can still drill down and see how it works ‘under the hood’, but you don’t have to worry about the details when looking at the broader picture.

Code reuse is frequently paired along with encapsulation, but basically it’s the approach of applying the same idea (set of nodes) in different situations without having to duplicate your work each time.  It’s obviously more effort to duplicate the work each time, and any bugs or feature changes would have to be done in each copy independently.

Here’s a quick comparison of the benefits and limitations of the different approaches:

FunctionsEventsMacrosCollapsed Graphs
Execution PathsOneOneAnyAny
Non-exec OutputsAnyNoneAnyAny
Latent actionsNoYesYesYes*
Add components/timelinesNoYesNoYes*
Other eventsNoN/ANoYes*

* A collapsed graph inherits the limits of the graph it is in, e.g., a collapsed graph inside of a function still cannot contain latent actions or timelines.

Collapsed Graphs

You can make a collapsed graph from a selection of nodes by right-clicking on one of the nodes and selecting ‘Collapse Nodes’. Any wires to nodes outside of the selection set will become inputs or outputs to the new collapsed node. Once collapsed, you can hover over the node to see a preview of the nodes in the contained graph.
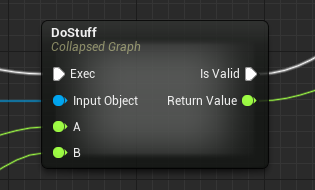
Collapsed graph node

Collapsed graphs can contain any kind of node that is allowed in their current context and have no limits on their inputs/outputs.  Collapsed graphs may seem like the best pick of the bunch with no limitations on the nodes they contain, but they are limited to only encapsulation, not code reuse.  If you copy-paste a collapsed graph, all of the nodes inside get duplicated too, making a new collapsed graph rather than referencing the original.

Functions and Events

You can create your own empty functions using the Add Function button on the ‘My Blueprints’ toolbar or turn a selection of nodes (if it meets the limitations) into a function using the ‘Collapse to Function’ option when right-clicking on a selected node.  You can make new events using the Add Custom Event… action in the graph context menu.  A function shows up as a separate graph in the My Blueprints list, while events go into an event graph which can contain many different events.

Functions and events can both be called from other places in the blueprint just like calling a function defined in C++.  Both of them define a single path of execution from an outside caller’s perspective, although they can have branching or loops internally.  Events can also have their execution flow delayed by a latent action or even merge into the flow for another event.
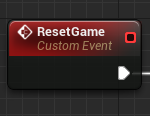
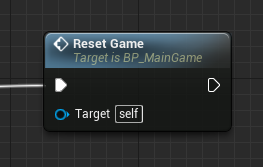
Functions are guaranteed to execute and return immediately by limiting what kinds of nodes can be placed in a function (latent actions, timelines, etc… are all prohibited).  This allows them to return a value to a C++ caller, which isn’t possible when using events or macros.

Functions and events are also how C++ can call into Blueprints.  C++ can define a function as a BlueprintImplementableEvent which can be implemented in a Blueprint.  These functions have no built-in behavior, and will do nothing if called without a blueprint implementation, but they can instead be declared as a BlueprintNativeEvent, and provided with a C++ definition as well.  Although these UFUNCTION() keywords mention just events, they will turn into either events or functions in a blueprint when implemented in a Blueprint, depending on whether they have any return values or not.

Macros

You can create a new empty Macro using the Add Macro option on the ‘My Blueprints’ toolbar, or turn a selection of nodes into a macro using the ‘Collapse to Macro’ option when right-clicking on a selected node.  You can also create Blueprint Macro Libraries, sharing macros across many blueprints.  This makes them one of the most effective means of Blueprint code reuse.  I’ll go into more depth on macros and macro libraries in a future post.
Calling a Macro

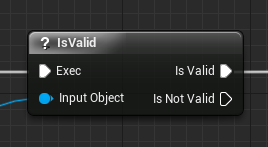
Macros can have arbitrary inputs and outputs, including execution wires.  Macros can be called in the same way as functions or events from a blueprint, but they aren’t visible from C++ code.  Like collapsed graphs, macros don’t really exist in a compiled blueprint; every instance gets expanded out into a unique set of nodes during compilation.

Since you can have more than one instance of a macro, some things like custom events are prohibited inside of the macro, since there’d be ambiguity in which one (or in which order) to execute them.  Timelines and Add Component nodes are currently also prohibited due to implementation details, but we’d like to allow them in the future.

Comments

Comments are basically a present to future-you from current-you; explaining what your intentions were or making a note of potential issues and additional work to be done.
Comment boxes

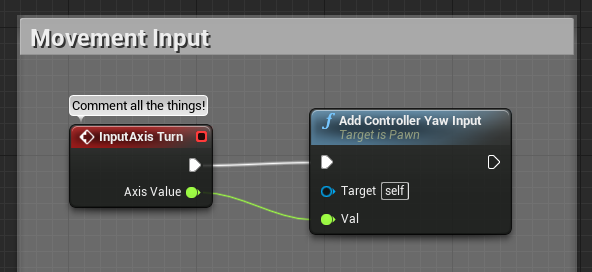
You can place a comment box around selected nodes by pressing C.  By default these boxes move all contained nodes around with them, but you can change that behavior as well as the color in the Details panel.  You can edit the comment just like any other editable title by double-clicking on it or pressing F2.  You can also comment any other individual nodes using the field in the context menu for that node, which will show up as a bubble above the node.

Finally, you can write a comment that will show up in the Content Browser tooltip for your Blueprint by ‘Blueprint Properties’ and editing the ‘Blueprint Description’ in the Details panel.  This is really useful for gameplay Blueprints that don’t have a thumbnail preview, but it’s still good to add usage notes even for things like level props that have a thumbnail.
Asset Navigation Shortcuts

Originally posted on the Unreal Engine blog.

We’ve worked really hard to provide you guys with lots of helpful shortcuts to streamline your workflow within the Editor. One of those improvements is the addition of asset navigation shortcuts.

Opening an asset to edit

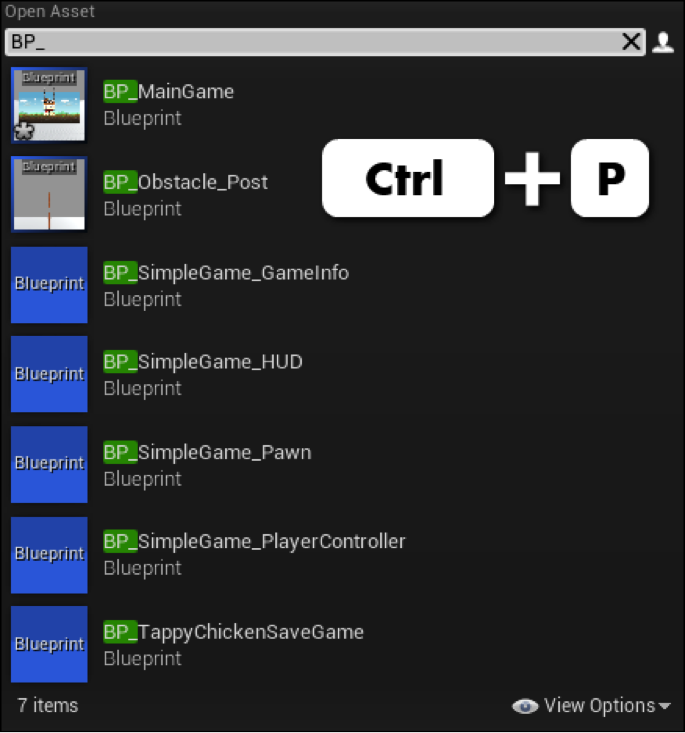
You can Pick an asset to edit from almost anywhere in the editor by using the Ctrl+P shortcut. This will open an asset picker with the search box already focused. Once you’ve filtered the results, you can use the arrow keys to select an asset and hit Enter to start editing it. The mouse also works to select or scroll, and you can even drag/drop out of the picker into the level editor.

Ctrl+P Asset Picker

Working with the assets of selected actors

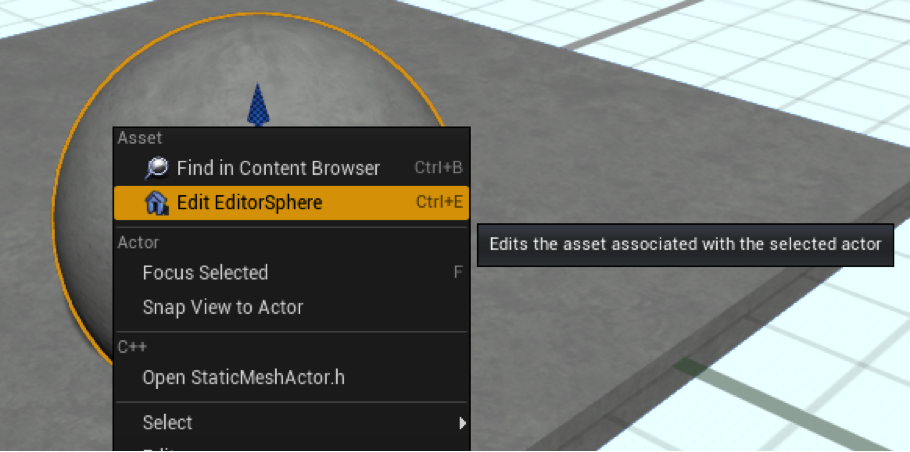
When you have one or more selected actors in the level editor, you can Edit their associated assets using Ctrl+E. For example, a selected static mesh actor will open the associated static mesh, while a selected blueprint instance will open the blueprint.

If you want to perform some other action on the asset, or just find out where it lives in the Content tree, you can use Ctrl+B to select the associated asset in the Content Browser. This shortcut also works in any asset editor, selecting the current asset being edited in the content browser.

Ctrl+E and Ctrl+B selection actions

Diffing Unreal Assets

Originally posted on the Unreal Engine blog.

So, source control is awesome, and you should be using it! One of the benefits of source control is being able to look at previous versions of files and compare or ‘diff’ them to see how things have changed. However, regular diff tools don’t work very well on binary files like Unreal .uasset packages. We’ve got you covered with support for exporting a text version of assets that can be diffed using your preferred tool, as well as a built-in specialized diff tool for Blueprints.

Setup

You’ll need to store your project in a supported source control system for the built-in tools to work. The editor currently has source control plugins for both Perforce and SVN. Perforce is what we use internally at Epic, and it is now free for up to 20 users (and 20 workspaces; you’ll probably end up using 2 or 3 per human user). SVN is totally free and there are a number of cloud SVN providers if you don’t want to host your own server.

Note: SVN binaries were not included in the 4.0 release, check out this thread for more details.

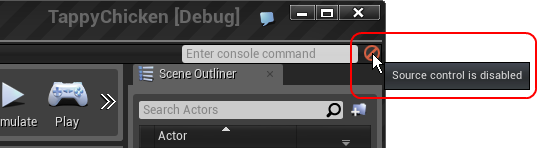
You can tell if your editor is currently connected to source control by the little icon on the top right of the main frame, next to the [Enter console command] prompt. If the icon is green, you are already connected, but if it shows up as a red no sign then click on it to enter your server settings.

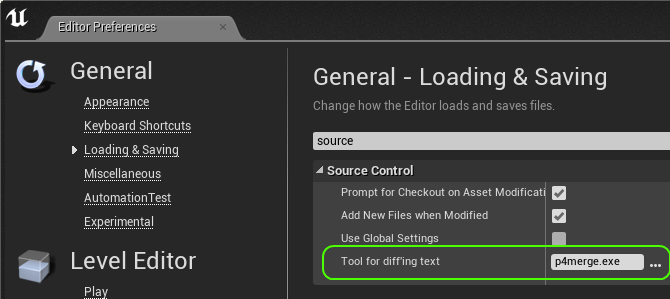
Next, you need to tell the editor where it can find your favorite text diff tool in Editor Preferences. It defaults to p4merge, but almost any diff tool should work (e.g., Beyond Compare, Araxis Merge, Tortoise Merge, etc…)

Picking your preferred diff tool

Diffing assets

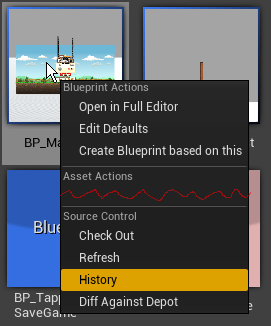
Once you are connected, you’ll see additional options in the context menu for Assets, such as ‘Check Out’, ‘History’, and ‘Diff Against Depot’. Any asset can be diffed, and the default handler will export the asset to a readable text format and launch your preferred text diffing tool (some assets have a more sophisticated viewer). Comparing your current version against depot before checking in is a useful habit to form; it will help you write better checkin comments and can also help catch changes you made to test something but didn’t intend to keep.

Source control context menu commands

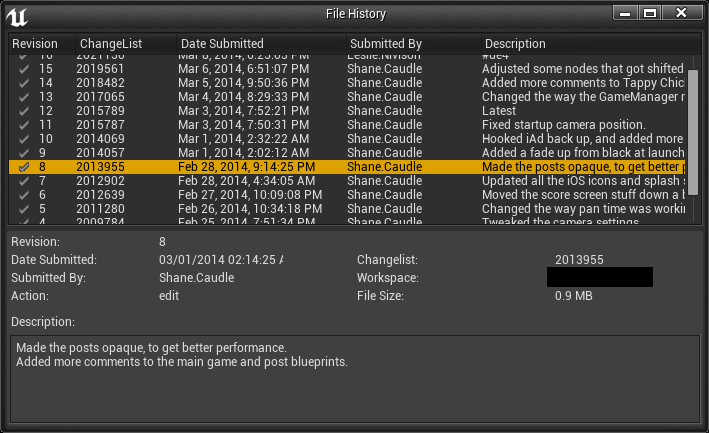
History gives you a full list of the previous checkins and their descriptions, and you can diff any two arbitrary revisions from the history window (select two revisions and right-click). This can be extremely useful when trying to track down a regression (be kind to future you and write good checkin comments).

Revision history display

Diffing Blueprints

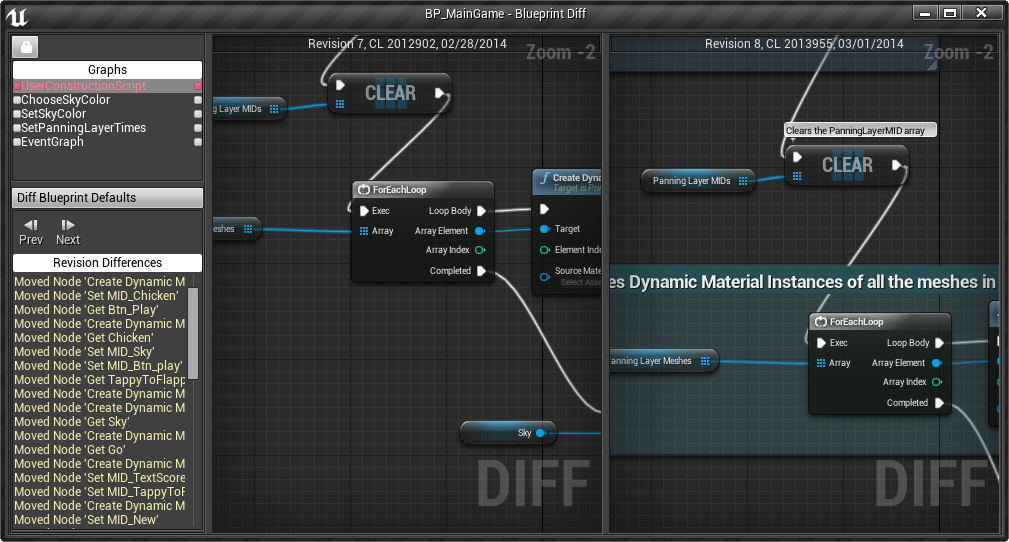
Blueprints are a much more visual medium and a textual diff wouldn’t be very helpful. The editor has a built-in diffing tool for blueprints where you can look at differences in each graph or diff the default values. We’ll talk about this in more detail in a future blog post, but here’s a picture of the tool

Blueprint Diff Tool

Unreal Property System (Reflection)

Originally posted on the Unreal Engine blog.

Reflection is the ability of a program to examine itself at runtime. This is hugely useful and is a foundational technology of the Unreal engine, powering many systems such as detail panels in the editor, serialization, garbage collection, network replication, and Blueprint/C++ communication. However, C++ doesn’t natively support any form of reflection, so Unreal has its own system to harvest, query, and manipulate information about C++ classes, structs, functions, member variables, and enumerations. We typically refer to reflection as the property system since reflection is also a graphics term.

The reflection system is opt-in. You need to annotate any types or properties that you want to be visible to the reflection system, and Unreal Header Tool (UHT) will harvest that information when you compile your project.

Markup

To mark a header as containing reflected types, add a special include at the top of the file. This lets UHT know that they should consider this file, and it’s also required for the implementation of the system (see the ‘A peek behind the curtain’ section for more information).

#include "FileName.generated.h"

You can now use UENUM()UCLASS()USTRUCT()UFUNCTION(), and UPROPERTY() to annotate different types and member variables in the header. Each of these macros goes before the type or member declaration, and can contain additional specifier keywords. Let’s take a look at a real world example (from StrategyGame):

// Base class for mobile units (soldiers)

#include "StrategyTypes.h"
#include "StrategyChar.generated.h"

UCLASS(Abstract)
class AStrategyChar : public ACharacter, public IStrategyTeamInterface
{
	GENERATED_UCLASS_BODY()
	
	/** How many resources this pawn is worth when it dies. */
	UPROPERTY(EditAnywhere, Category=Pawn)
	int32 ResourcesToGather;
	
	/** set attachment for weapon slot */
	UFUNCTION(BlueprintCallable, Category=Attachment)
	void SetWeaponAttachment(class UStrategyAttachment* Weapon);
	
	UFUNCTION(BlueprintCallable, Category=Attachment)
	bool IsWeaponAttached();

protected:
	/** melee anim */
	UPROPERTY(EditDefaultsOnly, Category=Pawn)
	UAnimMontage* MeleeAnim;
	
	/** Armor attachment slot */
	UPROPERTY()
	UStrategyAttachment* ArmorSlot;
	
	/** team number */
	uint8 MyTeamNum;
	
	[more code omitted]
};

This header declares a new class called AStrategyChar deriving from ACharacter. It uses UCLASS() to indicate it is reflected, which is also paired with a macro GENERATED_UCLASS_BODY() inside of the C++ definition. The GENERATED_UCLASS_BODY() / GENERATED_USTRUCT_BODY() macros are required in reflected classes or structs, as they inject additional functions and typedefs into the class body.

The first property shown is ResourcesToGather, which is annotated with EditAnywhere and Category=Pawn. This means the property can be edited in any details panel in the editor, and will show up in the Pawn category. There are a couple of annotated functions marked with BlueprintCallable and a category, meaning they’ll be available to call from Blueprints.

As the MyTeamNum declaration shows, it’s fine to mix reflected and non-reflected properties in the same class, just be aware that the non-reflected properties are invisible to all of the systems that rely on reflection (e.g., storing a raw unreflected UObject pointer is usually dangerous since the garbage collector can’t see your reference).

Each of the specifier keywords (such as EditAnywhere or BlueprintCallable) is mirrored in ObjectBase.h with a short comment on the meaning or usage. If you’re not sure what a keyword does, Alt+G will usually work to take you to the definition in ObjectBase.h (they aren’t real C++ keywords, but Intellisense or VAX don’t seem to mind/understand the difference).

Check out the Gameplay Programming Reference for more information.

Limitations

UHT isn’t a real C++ parser. It understands a decent subset of the language and actively tries to skip any text that it can; only paying attention to reflected types, functions, and properties. However, some things can still confuse it, so you may have to reword something or wrap it in an #if CPP / #endif pair when adding a reflected type to an existing header. You should also avoid using #if/#ifdef (except for WITH_EDITOR and WITH_EDITORONLY_DATA) around any annotated properties or functions, since the generated code references them and will cause compile errors in any configuration where the define isn’t true.

Most common types work as expected, but the property system can’t represent all possible C++ types (notably only a few template types such as TArray and TSubclassOf are supported, and their template parameters cannot be nested types). UHT will give you a descriptive error message if you annotate a type that can’t be represented at runtime.

Using reflection data

Most game code can ignore the property system at runtime, enjoying the benefits of the systems that it powers, but you might find it useful when writing tool code or building gameplay systems.

The type hierarchy for the property system looks like this:

  • UField
    • UStruct
      • UClass (C++ class)
      • UScriptStruct (C++ struct)
      • UFunction (C++ function)
    • UEnum (C++ enumeration)
    • UProperty (C++ member variable or function parameter)
      • (Many subclasses for different types)

UStruct is the basic type of aggregate structures (anything that contains other members, such as a C++ class, struct, or function), and shouldn’t be confused with a C++ struct (that’s UScriptStruct). UClass can contain functions or properties as their children, while UFunction and UScriptStruct are limited to just properties.

You can get the UClass or UScriptStruct for a reflected C++ type by writing UTypeName::StaticClass() or FTypeName::StaticStruct(), and you can get the type for a UObject instance using Instance->GetClass() (it’s not possible to get the type of a struct instance since there is no common base class or required storage for structs).

To iterate over all members of a UStruct, use a TFieldIterator:

for (TFieldIterator<UProperty> PropIt(GetClass(), EFieldIteratorFlags::IncludeSuper); PropIt; ++PropIt)
{
	UProperty* Property = *PropIt;
	// Do something with the property
}

The template argument to TFieldIterator is used as a filter (so you can look at both properties and functions using UField, or just one or the other). The second argument to the iterator constructor indicates whether you only want fields introduced in the specified class/struct, or fields in the parent class/struct as well (the default); it doesn’t have any effect for functions.

Each type has a unique set of flags (EClassFlags + HasAnyClassFlags, etc…), as well as a generic metadata storage system inherited from UField. The keyword specifiers are usually either stored as flags or metadata, depending on whether they are needed in a runtime game, or only for editor functionality. This allows the editor-only metadata to be stripped out to save memory, while the runtime flags are always available.

You can do a lot of different things using the reflection data (enumerating properties, getting or setting values in a data-driven manner, invoking reflected functions, or even constructing new objects); rather than go in depth on any one case here, it’s probably easier to have a look thru UnrealType.h and Class.h, and track down an example of code that does something similar to what you want to accomplish.

A peek behind the curtain

You can safely skip this section if you just want to use the property system, but knowing how it works helps motivate some of the decisions and limitations in headers that contain reflected types.

Unreal Build Tool (UBT) and Unreal Header Tool (UHT) act in concert to generate the data that is needed to power runtime reflection. UBT has to scan headers to do its job, and it remembers any modules that contain a header with at least one reflected type. If any of those headers have changed since the last compile, UHT is invoked to harvest and update the reflection data. UHT parses the headers, builds up a set of reflection data, and then generates C++ code containing the reflection data (contributing to a per-module .generated.inl), as well as various helpers and thunk functions (per-header .generated.h).

One of the major benefits of storing the reflection data as generated C++ code is that it is guaranteed to be in sync with the binary. You can never load stale or out of date reflection data since it’s compiled in with the rest of the engine code, and it computes member offsets/etc… at startup using C++ expressions, rather than trying to reverse engineer the packing behavior of a particular platform/compiler/optimization combo. UHT is also built as a standalone program that doesn’t consume any generated headers, so it avoids the chicken-and-egg issues that were a common complaint with the script compiler in UE3.

The generated functions include things like StaticClass() / StaticStruct(), which make it easy to get reflection data for the type, as well as thunks used to call C++ functions from Blueprints or network replication. These must be declared as part of the class or struct, which explains why a GENERATED_UCLASS_BODY() or GENERATED_USTRUCT_BODY() macro is included in your reflected types, as well as the #include "TypeName.generated.h" which defines those macros.

Blueprint Editor Tips and Tricks

Originally posted on the Unreal Engine blog.

Context is King

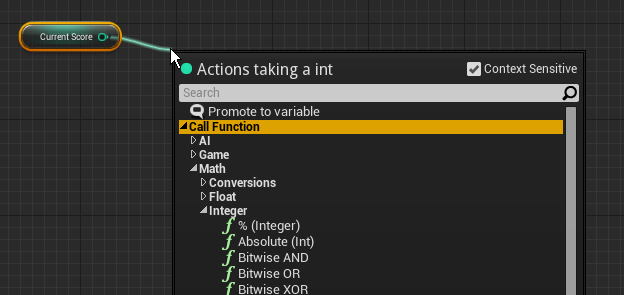
When you’re working with the blueprint editor, it’s important to remember that context is king. If you right-click on a blueprint graph, you’ll get a list of actions that make sense in the context of the current blueprint and graph.

For example in an Actor based blueprint, you’ll get offered actions that target an Actor, as well as ones that work in any context. Similarly, if you drag off of a pin and let go on the graph background, the action menu will be filtered to actions that take or provide a value matching the pin type and direction.

The current context filter is always displayed at the top of the action menu, which can be helpful if you don’t see something you were expecting to find.

Blueprint Editor Action Menu

This filtering helps you find actions and place nodes quickly, but it requires a bit of forward planning that doesn’t always match the way you think when solving a problem. You need a specific object before you can see actions for that object (e.g., you need a static mesh component before you can look for SetStaticMesh).

The palette exists to help when you come up with the action before the target; it isn’t filtered by context and contains all possible actions.  You can drag-and-drop nodes from the palette into the graph, just like you can drag your custom functions from the My Blueprint list.  You can also disable the filtering in the action menu using the check box on the top right, but don’t forget about it, since it will stay unfiltered until you check the box again.

Searching

You can search in the current blueprint or in all blueprints in your project (even unloaded blueprints!) using Ctrl+F or Ctrl+Shift+F. Almost anything can be searched, including references to a variable or function, comments, literal values, etc…  There are also shortcuts to search for function and variable references in the context menu for your variables and user defined functions.

Cheat Sheet

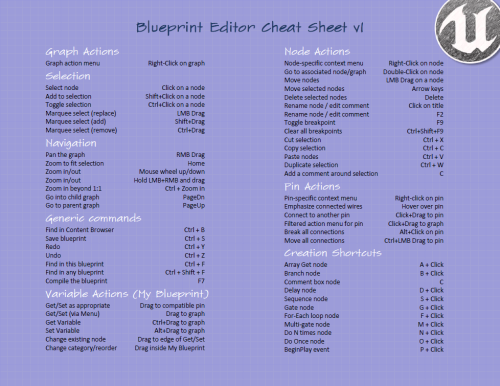
The blueprint editor has a lot of productivity boosting shortcuts built-in, and while many will come naturally as you use the editor, others are a little bit hidden. These gems are well worth learning, so here is a cheat sheet of controls, keyboard shortcuts, and some useful actions:

Click to download: Color Version | Black/White Version

Fun with variables

You can create a new variable from any data pin by using the right click option ‘Promote to Variable’, which will automatically be hooked up to read/write it. As the cheat sheet mentions, there are also several useful actions when dragging variables from the My Blueprint tab:

  • Drag onto a pin: Places and connects a new get/set as appropriate
  • Drag to an existing variable get/set node: Changes it to read/write the dragged variable
  • Drag into the graph background: Offers a menu to get/set it; use Ctrl or Alt to force a Get or Set
  • Drag inside My Blueprint: Reorder the variables in a category or change categories

You can also clean up unused variables using ‘Edit..Delete Unused Variables’ to help tidy up your BP.

Unreal Engine 4 released!


I’ve been working on UE4 for the majority of my time at Epic, and I can finally talk publically about all the cool stuff that went into it! We announced (and launched) a subscription plan last week at GDC 2014.

You can get access to the UE4 editor, tools, and entire source code for a $19 per month subscription (and 5% gross royalty if you make money off of it). We’ve also got a bunch of code and content examples, with more coming over time. The EULA and subscription terms are concise and reasonable; you can cancel at any time and keep using what you’ve downloaded, renew when you want, etc…

On a related note: I will also be blogging at unrealengine.com, starting today with a post on Blueprint Editor Tips and Tricks, including a printable cheat sheet of BP editor controls / shortcuts (Cheat Sheet or Printable version).

Guided Content Optimization for Gears of War 3

I gave a talk at the East Coast Game Conference this year titled “Guided Content Optimization for Gears of War 3”, which went over pretty well.  The slides are available here

The talk was about the processes and tools that we developed/extended to help make Gears of War 3, covering our philosophy, memory and performance feedback loops, and some of the tools that help gather, process, or visualize performance data.

The talk was intended for a more general audience, but there are lots of UE3 specific documents on UDN that dive into more detail: