This space will slowly fill out as posts are moved over.
Update: All of the posts are moved over now, but some images / attachments are still missing and will be added over time.
Safe Zones
Q: What do an iPhone X and a 50 year old CRT have in common?
A: Each has a portion of the display that you can’t effectively use (though for entirely different reasons).
History lesson
CRT screens are curved, they don’t have perfect square corners, the beam overscans a bit, and many did not have variable focus to keep the beam sharp across the entire screen. All of these factors combine to cause problems at the edge of the screen, but just how much varies from screen to screen. TV standards resolve this by defining safe zones guaranteed to be usable on most any TV.
LCDs and other modern display technologies don’t have the same limitations as CRTs, but to maintain compatibility with content made for CRTs, many TVs will take the input and overscan it and then crop it, causing the exact same problem (and preventing digital sources from being displayed at 1:1 to boot). Depending on your TV, you might be able to reduce or disable the effect when playing games (sometimes it depends on the input being used, with VGA or DVI being displayed as-is, and HDMI being overscanned), but you can’t count on that working for your users.
Safe zones and games
These safe zones have been an issue that console developers have had to deal with since the beginning, but it’s relatively new to mobile developers as phones add notches and wrap-around screens. As long as you paint within the lines, everyone will be able to see it.
Typically the safe zones are split up into two concepts:
- Title safe area – This is where text is fully readable, anything important to the player or viewer should be displayed here.
- Action safe area – This is at least as large as the title safe area, and may be larger. The area between this and the title safe area is still probably visible, so you’d want things like background graphics to still extend here.
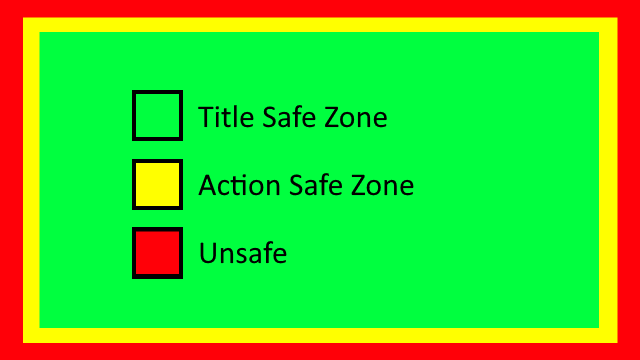
For TV the distinction matters, but for the most part in games it’s unimportant. Make sure all UI elements stay within the title safe zone and you’re probably OK with all of the 3D elements filling the full screen. The only time when you might want to distinguish between them (assuming the platform you’re on even makes the distinction) is if you have a fixed camera view: you don’t want the player (or threats to the player) to travel beyond the action safe zone (because they might become invisible in the overscan), but clamping them all the way to the title safe zone might feel a little bit conservative.
How to paint within the lines in UE4
If you’re using UMG for all of your UI, USafeZone is your friend. It’s a container panel that should be used to wrap your HUD or the important aspects of your front end UI, and it lets you pick if you want it to adjust to match the title or action safe zones. You don’t need a bunch of them, just one at the top level (typically in the widget you directly add to the viewport overlay stack).
USafeZone uses FDisplayMetrics to query the safe zone for the current platform, in case you ever need to directly access the safe zone information in C++. On platforms that have no native safe zones (like PCs), you can use the console commands r.DebugSafeZone.TitleRatio and r.DebugActionZone.ActionRatio to simulate one. These both range from 0..1, and default to 1 indicating 100% of the display is safe. A typical test value would be around 0.9 but an important caveat is that safe zones were originally designed for full screen use, so these percentages are only accurate if you test in fullscreen. For quick spot checks it doesn’t matter, as you’re just verifying that all the important stuff moved inwards, but when fine tuning layouts you probably want to see something representative by going to windowed fullscreen or at least maximizing the window.
You can also visualize the current safe zone (on any platform) using r.DebugSafeZone.Mode, which can draw a translucent border on the screen:
0: Do not display the safe zone overlay
1: Display the overlay for the title safe zone
2: Display the overlay for the action safe zone.
Not using Unreal?
I can’t help you for consoles without breaking NDAs, check the vendor documentation for what the certification requirements are and how to query the current safe zone.
For iOS, it’s a new concept starting in iOS 11: UIEdgeInsets is an anchor term to search for. I’m not sure if Android has an equivalent API yet, but it’s going to be important soon.
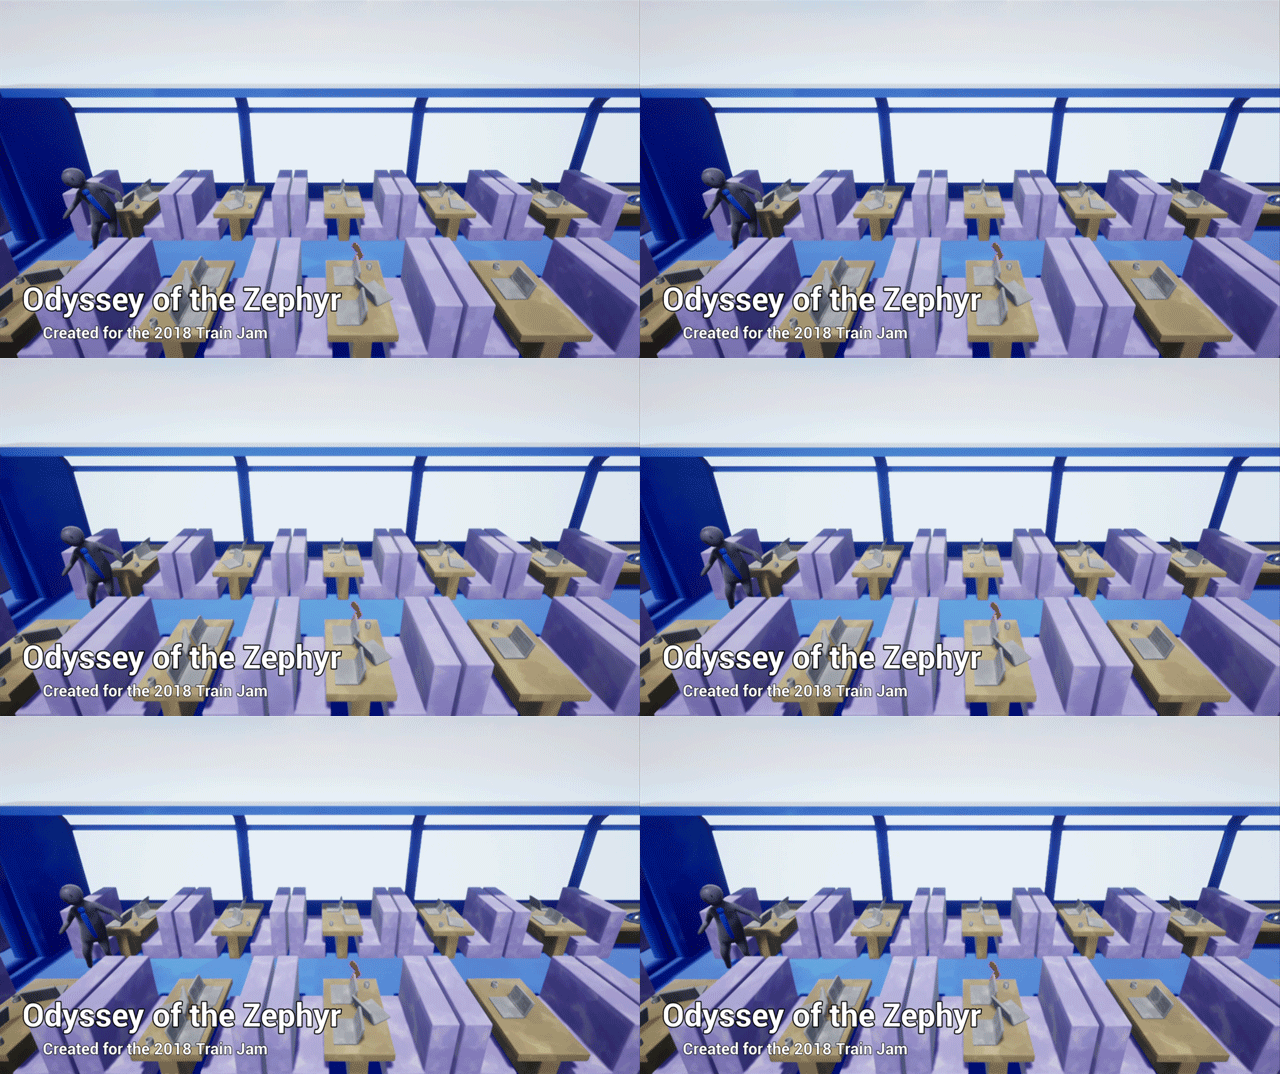
Odyssey of the Zephyr
Created for the 2018 Train Jam (download it here).
Wander around, meet new friends, and help them find happiness.
Controls:
- WASD to move
- Interact with Q/E/Space/LMB
- Drop items with RMB
Jammers:
- Alic Szecsei (@ASzecsei)
- Heather Kemp (@IAmHeatherKemp)
- Kayla Techmeier (@KaylaTechmeier)
- Michael Noland (@joatski)
Dwarf Orders
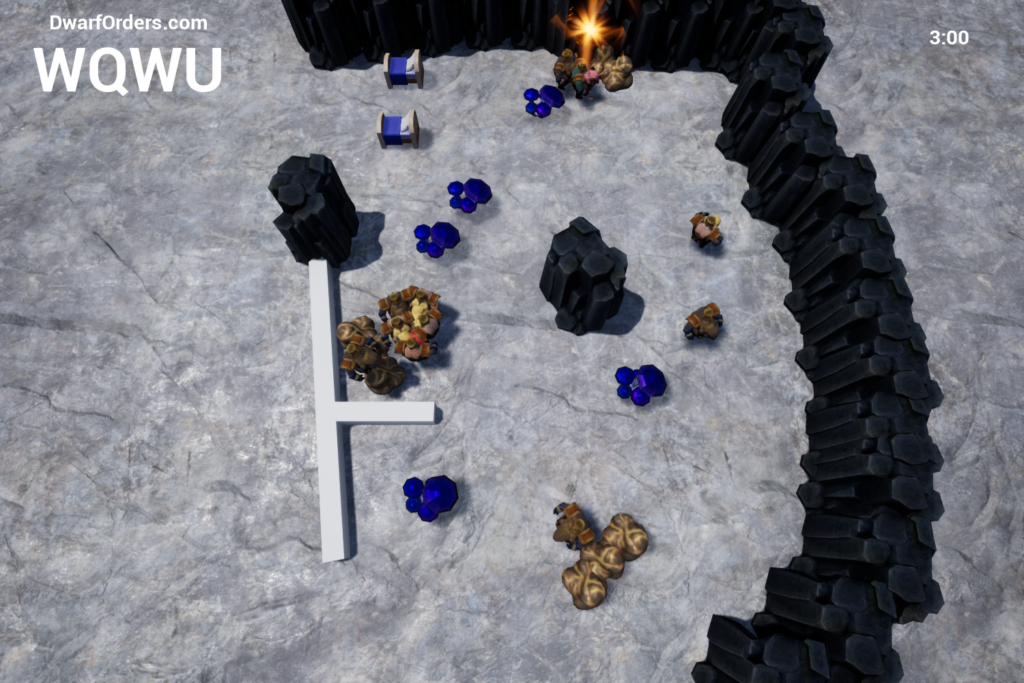
Dwarf Orders is a local multiplayer party game, controlled with your phone and visualized on a shared screen where you send orders to a bunch of unruly dwarven miners, hoping they accomplish the shared goals.
In classic tradition we tried to do something ambitious tech-wise for the 2018 GGJ and finished the basics just in time, without much room for polish or fun. We plan on trying to reuse the party game infrastructure at a future jam; should go much quicker the second time around.
How to play:
Download the shared screen game from the GGJ site, unzip and run DwarfOrders.exe, then follow the instructions on-screen to connect one or more phones to the game. Press “Force Start” when ready.
Tap on dwarves then tap again to transmit orders to them to go somewhere. They’re a bit unruly, so they might not do what you expect after reaching their ordered destination.
Jammers:
- Michael Noland
- Nick Darnell
- Danny Gallagher
Additional assets:
- “Industrious Ferret” Kevin MacLeod (incompetech.com)
Licensed under Creative Commons: By Attribution 3.0 License
http://creativecommons.org/licenses/by/3.0/ - Various assets from UE4 learning examples, licensed for use with UE4
Molecular Ignition
Click your way to stimulation.
This was my entry for LD39 and #clickclickclick, ish. Download it from itch.io (the project files are there too).
Note: I realized my core game idea wasn’t really going to work pretty early on, and decided to focus on ‘feel’ and learning Cascade instead, so there’s a lot of juiciness but little substance (more of a toy than a game, though it is possible to fail).
Built using Unreal Engine 4.16.2 entirely in Blueprints.
Music Credits:
Hypnothis Kevin MacLeod (incompetech.com)
Licensed under Creative Commons: By Attribution 3.0 License
http://creativecommons.org/licenses/by/3.0/
Zen Miner
Mine, Sell, Upgrade, Repeat
Zen Miner is meant to be a chill mining game in the style of Miner Dig Deep where a fox collects ore and sells it to purchase upgrades, allowing them to go deeper and find better ores. This fox is all about the vicious loot cycle.
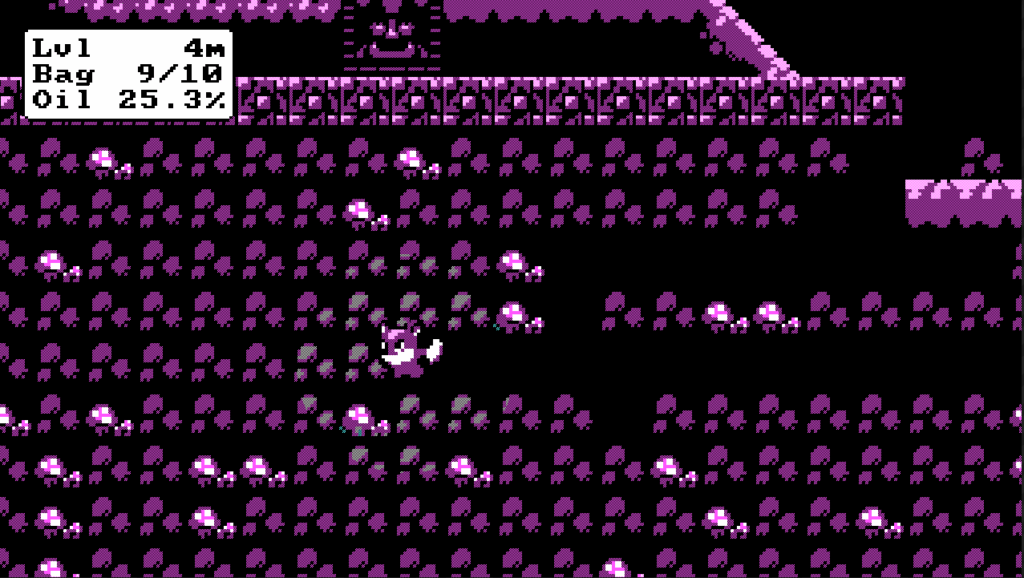
Created for #cgajam using CGA palette 1 and a nearly CGA 320×180 virtual resolution (dithering happens at a higher resolution however, see this article for details on the post processing).
However, the gameplay was not really finished in time for the submission deadline; the uploaded build has the very basics of the gameplay loop (you can mine, sell ore, and refill your lamp oil, but there are no upgrades or deployable items yet). If you still want to play it, download it from itch.io.
Additional credits:
Creating simple tools in UE4 – part 1
In this series of articles I’m going to show how to create some high-impact, low-effort tools to help develop your game in UE4. Tools range from simple batch files or humble debug commands to complex ensembles like the UE4 level editor or Max/Maya; but for now let’s focus on some approaches that don’t require a broad knowledge of Unreal Engine or Slate to pull off. Some of these topics deserve a post of their own, but I’m going to start with more of a survey approach and see what people are most interested in digging into.
Programming is all about strategic laziness: the guiding philosophy developing tools is to spend time now to save someone time later, improving overall developer efficiency. This might play out by allowing the user to finish the same tasks in less time or it might allow them to perform more iterations in the same amount of time, increasing polish level and fun factor. Ideally you also save more time than was involved in making the tool, but that is not a hard requirement due to other factors like user morale, making it possible for a different group of people to do the work, reducing mistakes when the cost of failure is high, etc… This is especially true when it comes to automating key processes where a mistake might cause downtime or otherwise hurt your customers, e.g., releasing a broken update or corrupting a database.
In the more typical cases where there’s a reasonable if slow or annoying alternative, estimating the !/$ (bang for the buck) is a pragmatic way to look at whether or not it’s worth making a tool: does this help more than it’s going to cost to create (given very rough estimates of both)? As always, there’s a relevant XKCD strip:
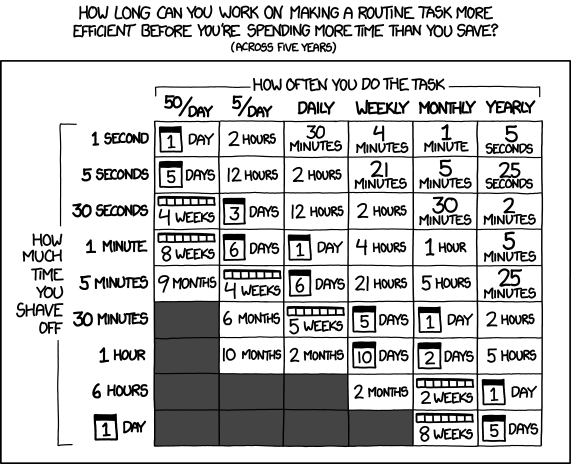
[don’t forget to multiply ‘how often’ by the number of developers impacted; tools that help 50 people on a team are much easier to justify than ones that help 2, much to the distress of audio developers everywhere]
- Part 1: Tools to help debug or iterate while the game is running
- Part 2: Tools for working with assets or actors in the editor [to be written]
- Part 3: Tools to automate repetitive tasks [to be written]
Part 1: Tools to help debug or iterate while the game is running
The debug console can be used to trigger commands and adjust console variables (CVars), and is available both in the editor and the game during development, though it is compiled out of the shipping game by default. It can be brought up by pressing the ` key (configurable in Project Settings), and commands can also be entered into the Output Log in the editor.
- “Command [Args]” – Executes a console command, which might expect arguments
- “CVar” – Prints out the current value of a CVar
- “CVar NewValue” – Sets the value of a CVar to NewValue
- “Command?” – Prints out help on the specified command or CVar
- “Help” – Saves a .html file with all CVars and most console commands
Console Variables (CVars)
Add console variables to tweak existing functionality at runtime or to control debug visualizations. There are a number of ways to define a console variable (check out IConsoleManager.h), but an important gotcha is that only float, int32, and FString types are supported (use an int32 in places you’d normally use a bool or an enum). A typical usage is going to be something like this:
#include "HAL/IConsoleManager.h"

int32 GSomeCoolDebugValue = -1;
static FAutoConsoleVariableRef CVarSomeCoolDebugValue(
	TEXT("MyGame.SomeCoolDebugValue"),
	GSomeCoolDebugValue,
	TEXT("This cool debug value controls how the foos are displayed\n")
	TEXT("  -1: Don't show any foos (default)\n")
	TEXT("   0: Show only the nearest foos\n")
	TEXT("   1: Show mid-range foos\n")
	TEXT(" >=2: Show all foos, even hidden ones"));

…

if (GSomeCoolDebugValue >= 0)
{
	// Show some set of foos based on GSomeCoolDebugValue
}
Console commands
Console commands let you execute code rather than change a variable value:
#include "HAL/IConsoleManager.h"

static FAutoConsoleCommandWithWorldAndArgs GMyCoolCommand(
	TEXT("MyGame.MyCoolCommand"),
	TEXT("Does cool things (this is the help text for the command)"),
	FConsoleCommandWithWorldAndArgsDelegate::CreateLambda([](const TArray<FString>& Args, UWorld* World)
	{
		UE_LOG(LogTemp, Log, TEXT("My cool command was passed %d args"), Args.Num());
	})
);
The example above gets a pointer to the current world but not a lot else to go on. In order to get closer to some game framework classes you can tag reflected member functions with the Exec specifier in the UFUNCTION() declaration (or by checking the Exec box in the BP editor). You can use this markup on functions in any class, but by default console commands are only ‘routed’ to a few kinds of classes (see this wiki page for more info). The three most interesting places where Exec functions work are pawns, player controllers, and the cheat manager.
Here’s an example that could be triggered by typing, e.g., “GiveHealth 25” when controlling a hypothetical APawnWithHealth instance:
// Heal the pawn for the specified amount
UFUNCTION(Exec)
void GiveHealth(float AmountToGive)
{
	Health = FMath::Clamp(Health + AmountToGive, 0.0f, MaxHealth);
}
Note that you can use parameters here and they’ll be automatically parsed for you, unlike FAutoConsoleCommandWithWorldAndArgs where you have to parse them yourself. If a parameter is missing then the default value for the type will be passed in.
Leaving code like this around in your shipping game is not always desirable, especially if it’s a multiplayer game where the client shouldn’t even be handling these sorts of things. Using a cheat manager subclass is a good way to concentrate sensitive debugging commands in one place which will be automatically disabled in Shipping builds. You can specify your custom cheat manager subclass in the CheatClass property of your player controller.
Remember how I mentioned that Exec functions are only callable from some classes by default? That’s not entirely true, you can still call functions on arbitrary classes using a special command: “ke ActorName EventName” will trigger the exec command on the specified actor (you can use * to broadcast to all actors that implement the named event). Similarly, any exec functions in a Level Script Blueprint can be called by using “ce EventName” (ce is short for cinematic event, and this is typically used to skip to specific scenes in a matinee or sequencer cinematic for ease of testing).
Random aside: abtest command
There is an amazingly useful console command called abtest which randomly switches back and forth between two values for a console variable or two console commands.
// Set CVar to value1 or value2 randomly every so often
abtest CVar value1 value2

// Calls Command1 or Command2 with optional arguments randomly every so often
abtest "Command1 Args1" "Command2 Args2 Args3"

// Stops whatever abtest has been running
abtest stop
This is useful when testing out the cosmetic impact of different settings, but it was really designed for performance testing. abtest spits out an estimate of potential time savings and a confidence in that estimate which updates every so often (trust the ‘gut reaction’, usually a real win will show up strongly and consistently very quickly, don’t go fishing for a lucky run that supports your bias). An important caveat is to make sure the code under test is on the critical path or the results will be meaningless noise due to the pipelined nature of the engine. There are other ways to do a/b testing in those cases, have a look at the code.
Stay tuned
Part 2 will likely cover the basics of creating a custom asset type, some approaches to data validation, and simple ways to customize the details panel or react to modifications.
CGA Post-Processing in UE4
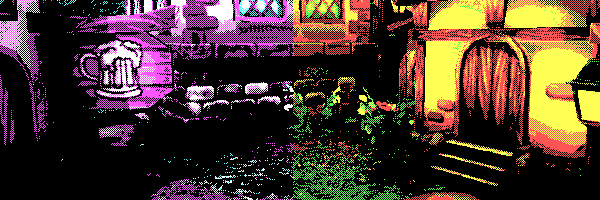
I spent some time last weekend prepping for #cgajam by playing around with different materials / effects to constrain a UE4 game to CGA colors, and came up with a drop-in post processing BP.
How to use
Download the template (requires Unreal Engine 4.16, licensed as CC0) and unzip it. You can either open the project directly and migrate the Content/CGAJam folder into your project or drop the whole folder into the templates directory of your 4.16 installation (e.g., C:\Program Files (x86)\Epic Games\UE_4.16\Templates) and then create a new project (info on how to make a project into a template here).
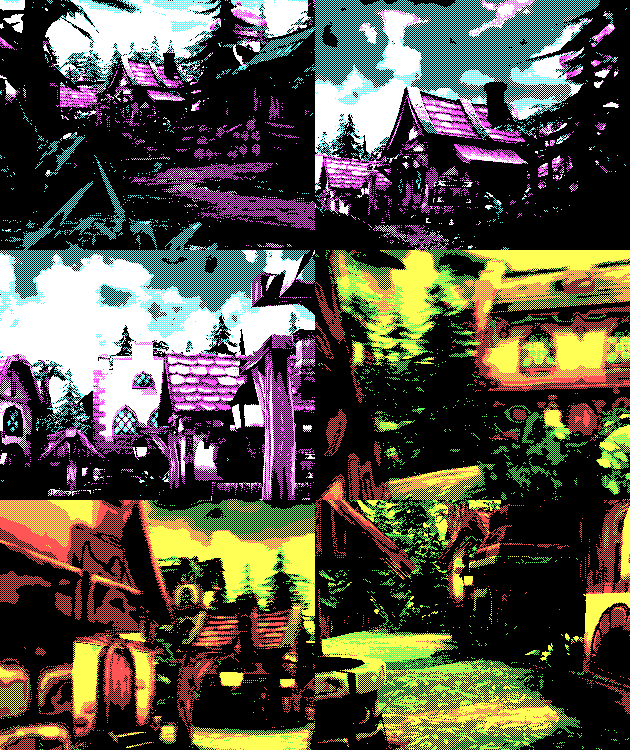
There’s an example map but all of the magic is wrapped up in BP_CGAPostProcess; just drop one into your level and try playing around with the settings to suit your content. You can pick one of the two palettes, adjust how much color-space dithering and screen space dithering there is, and tweak the overall gamma / brightness. For the hand painted environment I found 50% screen dither + 50% LUT dither at level 3 to give me the best results, but for the example scene with solid shapes and color fills, 100% screen dither with no LUT dither looked better.
Implementation details
CGA had a variety of different modes and palettes, but the most memorable for gaming was the 320×200 graphics mode using either palette 0 (black, red, green, yellow) or palette 1 (black, magenta, cyan, white). Color 0 (black) is actually adjustable to any of the 16 CGA colors, though it doesn’t appear to be allowed for #cgajam. The red and green components of colors 1..3 are the same in both palettes as well, only the blue color differs.
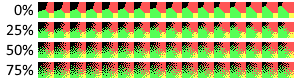
UE4 has a lookup-table texture (LUT) based color grading system, but there’s no way to control the filtering used to sample it, so it can’t produce ‘crisp’ CGA colors. It’s still useful to get colors to nearly the right place though. I’ve included 4 LUT textures for each palette with varying color-space dithering (0%, 25%, 50%, 75%); you can adjust the strength of the color grading as well to vary the effect.
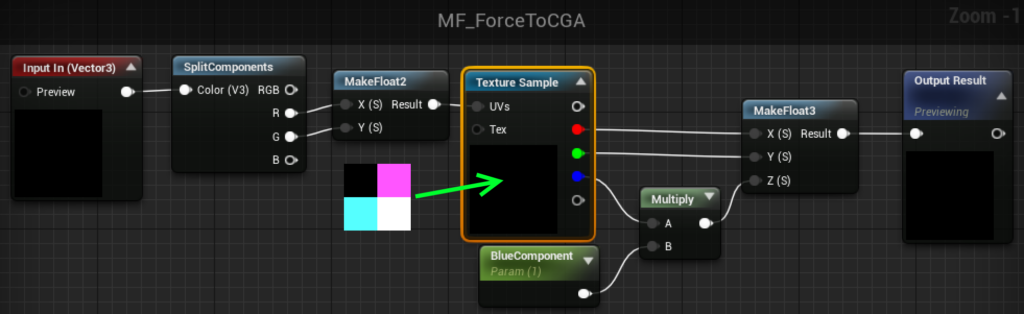
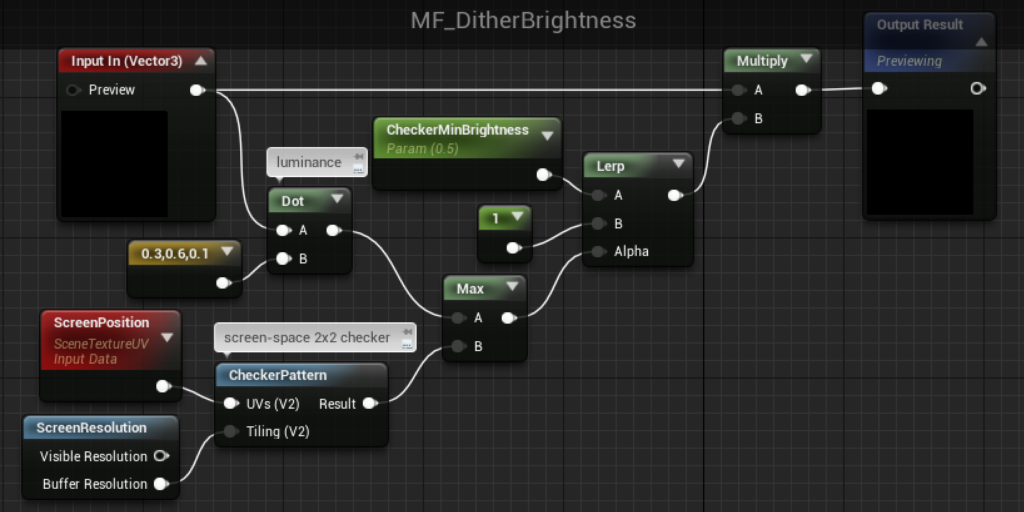
The post-process material (M_ForceCGA_PostProcess) has a screen-space dither pattern which dims based on brightness prior to matching to one of the four colors in the active palette. The color matching (MF_ForceToCGA) and dithering (MF_DitherBrightness) are split up into separate material functions to make them easier to reuse, e.g., in the UI material.
The actual color matching is done using a cheap lookup texture with red->U and green->V (the 2×2 texture is set to uncompressed, clamped instead of wrapped uvs, nearest filtering, etc… to give us a clean and exact output value). We can ignore the input blue entirely as mentioned above, and multiply the output blue with the correct value for the current palette (dim it for palette 0 and keep it as-is for palette 1).
User Interface
For the UI, you’ve got two options:
- Stick with the CGA colors, which need to be specified differently in the UI than in the world since UI happens in a different color space, e.g., yellow is (1,1,0.092) instead of (1,1,0.333) (the correct final color will show up in the hex sRGB setting of the color picker).
- Get in the right ballpark and use a retainer box with the Effect Material set to MI_ForceCGA_UI_Palette0 or MI_ForceCGA_UI_Palette1 to guarantee that you only use the correct 4 colors (recommended approach).Using a retainer box
Avoiding flickering artifacts
There are a couple of steps in the default UE4 post-processing chain that introduce temporal artifacts in order to improve overall image quality when doing realistic rendering. These steps become very noticeable and objectionable when you do something like threshold down to 4 colors, so the example project disables them (setting r.Tonemapper.GrainQuantization to 0 and disabling post-process Anti-aliasing entirely, though you could also switch from temporal AA to FXAA instead). The DefaultEngine.ini changes to do this won’t transfer over if you just migrate the content from one project to another, so you may need to paste in:
| [/Script/Engine.RendererSettings] r.DefaultFeature.AntiAliasing=0 [SystemSettings] r.Tonemapper.GrainQuantization=0 |
Resolution
Want a lower resolution that is a bit more like true CGA 320×200? Adjust the Screen Percentage on the post process component and set r.upscale.quality to 0 (nearest filtering) in the [SystemSettings] section of DefaultEngine.ini
Ideas for further improvement
Try combining it with an edge detection material (either on depth or on custom stencil if you want to limit the effect to foreground objects) to put black outlines around things.
Try other spatial variation patterns besides a 2×2 checkerboard; techniques like Real-time hatching would probably work quite well.
Credits
The map used in the example shots is from the “Hand Painted Environment” marketplace pack by Evgeniya Yaremko.
Customizing a UE4 project – launcher thumbnail and splash screens
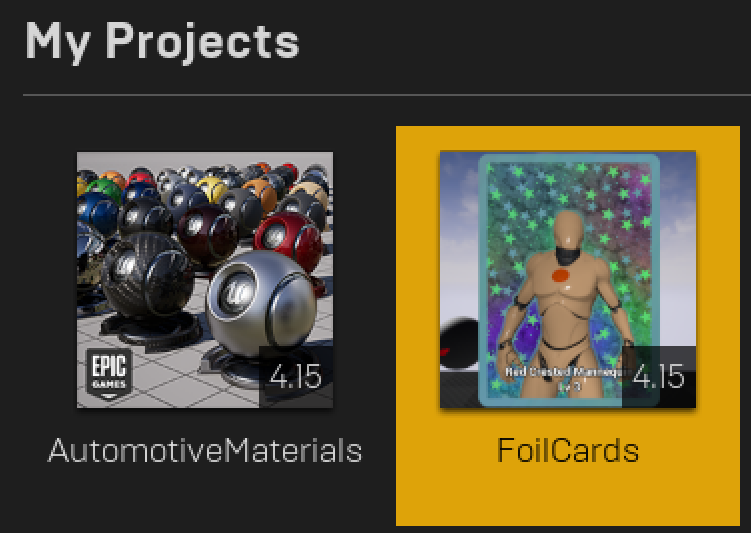
The Epic Games Launcher shows a thumbnail for each project, looking in two places: first in the root folder of the game for [ProjectName].png (next to the .uproject) and then Saved\AutoScreenshot.png, which is created by the editor automatically. You can create your own thumbnail (192×192 .png) and set it using the “Project Thumbnail” option in the Description category of Project Settings.
You can also customize the splash screen shown when the editor or game is starting up (separately for editor vs game, windows vs mac) in the Windows / Mac categories (under Platform) of Project Settings. The splash screens need to be .bmp (not .png), but they can be whatever size you want within reason (the startup text and project name are overlaid on top of it, so you’ll probably want to leave space for that).
You can pick application icons and mobile startup screens in the various platform settings options pages as well (the rules for these are varied and some platforms require a wide range of sizes, but it’s all listed in the corresponding settings pages and platform vendor web sites). Due to the variety of required splash screens for a universal iOS app, the size can start to add up noticeably, so it can be worthwhile to approach them differently, using large fill areas that will compress well, run pngcrush on them, etc….
Holographic foil card effect
Earlier this week I saw a really neat effect where @Sererena simulated the view-dependent shimmering of a foil card, fed by a smartphone accelerometer. This seemed like a good challenge to improve my material creation skills in UE4, so I gave it a go yesterday and came up with something I’m reasonably happy with. The view angle is controlled by WASD rather than the accelerometer since I was more focused on the material.
Download
You can download the assets and test project (built with Unreal Engine 4.15), licensed as CC0.
Construction
The material has 8 layers:
- Background
- Distant large stars
- Small stars / motes
- Near large stars
- Character foil outline
- Character
- Foil on character accents
- Card border
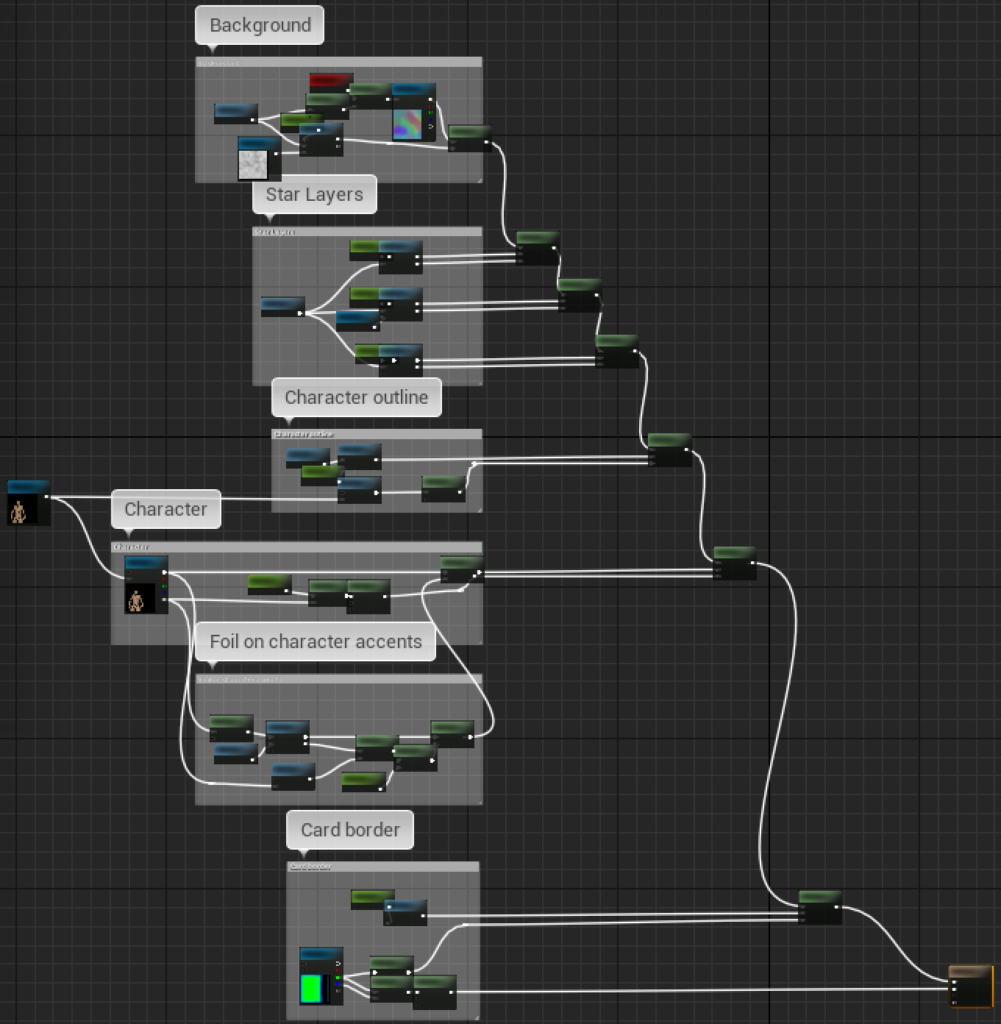
The foil character accent layer and the star layers all parallax as the view angle changes (shift around, with a larger shift for nearer layers, faking a sense of depth).
The foil layers (everything except the character) are colored by a lookup into a ‘holographic plate’ texture, using an ad hoc function of the tex coord, distance, and tilt amount.
The character accents layer is done with a color notch filter and one star layer, directly added to the character color (rather than lerping to it). This is the part I’m least happy with in the current implementation, but I’d need to test it with a real character to see exactly what I’d want to change.
The material is built using a bunch of material functions as building blocks to make it cleaner, but these aren’t meant to ‘stand alone’; there are lots of assumptions built into them about textures and parameter values.
I’m using a live capture of a 3D character instead of a 2D base, but after the capture Blueprint updates the render target, everything else is the same either way. The capture BP is an opaque box containing the character, a capture component, and a controlled light source. Even with setting the capture component to only capture the self actor and setting an aggressive culling distance, some ‘global’ things like atmospheric fog still render into it, so I had to use the mode that gave me depth in alpha rather than an opacity mask in order to discard it.
The outline is done with a Sobel edge detection filter on the thresholded depth from the character render target (which has depth as alpha). Rather than using a kernel of the adjacent texels, it uses texels 8 away to increase the width of the outline. If I were using 2D characters I’d probably skip the runtime Sobel filter and do that offline once into a mask texture.