Glitchovision 3000

This is an audiovisual instrument that I created for the 555 timer contest.

The Glitchovision 3000 is a 4 step sequencer controlling an ‘Atari Punk‘ synth with a greyscale NTSC video visualization of the output audio, built using two 558 quad-timers and two 556 dual-timers.

Here is a video of it in action:

Theory of operation

  • Video timing (two parallel channels of 1/2 556 feeding into 2/4 558, and finally combined via some 74ls08 AND gates).
  • Audio generation (4 step sequencer built from a 558 feeding into a 556 setup as a stepped tone generator).

Video timing (556 feeding into a 558)

First, a 556 (configured as two astable timers) generates two independent blanking signals, one horizontal and one vertical.

These signals are low for the time specified in the RS170 standard (3 lines for vsync, 10.9 us for hsync), although the final result isn’t exactly up to RS170 spec. It generates a ‘combined’ or industrial sync (which works on every TV I’ve ever tested), but RS170 requires serrating and equalizing pulses to be generated during vsync to prevent 1950s hsync oscillators from losing tracking.

Each blanking signal is fed into a 558 monostable timer, which generates the blanking signal (lasting longer than the sync signal and delaying until the image is about past the overscan).

The output of the h or v blank is fed into a second pair of 558 timers to generate an ‘active’ region of the screen, where we can display arbitrary data.

The two sync signals are combined with one AND gate into a CSYNC signal and the two active signals are combined (with wired AND from the 558 open-collector outputs, but buffered into another AND gate) to generate a CACTIVE signal.

These signals are used to generate the final composite video output, when combined with the audio signal.

Audio (558 feeding into a 556)

One 558 quad timer serves as a 4 step sequencer, similar to a traditional use of a 4017 decade counter. All four steps use the same timing components, but the overall step rate is controlled by varying the control voltage for the 558 timer. You can chain several 558’s together to get longer sequence lengths, but I only ended up wiring switches and pots for 4 steps.

The output of the sequencer is combined with the ‘left’ potentiometer of an atari punk synth implemented in the other 556 (conflating the two for the timing of the astable portion of the synth). The monostable portion of the Atari punk is bog standard, triggered by the astable portion.

The audio output is line conditioned and output, as well as being ANDed with the CACTIVE signal and merged with CACTIVE via some mixing pots to generate a final video signal. Listen and see that atonal goodness.

Notes:

  • Note 1: Adding a reset switch instead of relying on power-sequencing during startup seems like a solid addition. I didn’t have it in the prototype shown in the video, so it’s listed in the schematic in a dashed box. It would also provide a nice ‘tap to the rhythm’ reset, although it wouldn’t stop the later stages from playing like a reset on a 4017 would.
  • Note 2,3: Adding a pair of diodes here to keep the range of CV to ~0.7 to 4.3 V, or even some fixed value resistors should help prevent nastyness when the control voltage is taken too far out of whack.
  • Note 4: The other 558 in the lid board isn’t used. It’s partially wired up, but it’s not tied into the countdown of the main 558 sequencer, as I didn’t have time to wire up the other 4 switches and pots.
  • Note 5: Using the opposite end of the sequencer potentiometers as part of the timing circuit for another 558 counting verticallly downwards after triggering on vblank (and wired-ANDing the outputs from them with the output of the sequencer 558) should provide a visual indication of what the notes are (will need to move the switches to after the potentiometers).

The timings were worked out in an Excel spreadsheet (note: you might need to rename it back to xlsx to open it if it downloads as a ZIP).

The original writeup for the compo is still available at http://auia.net/timercompo/video555entry.html.

Persistence of vision display using only 555 timers

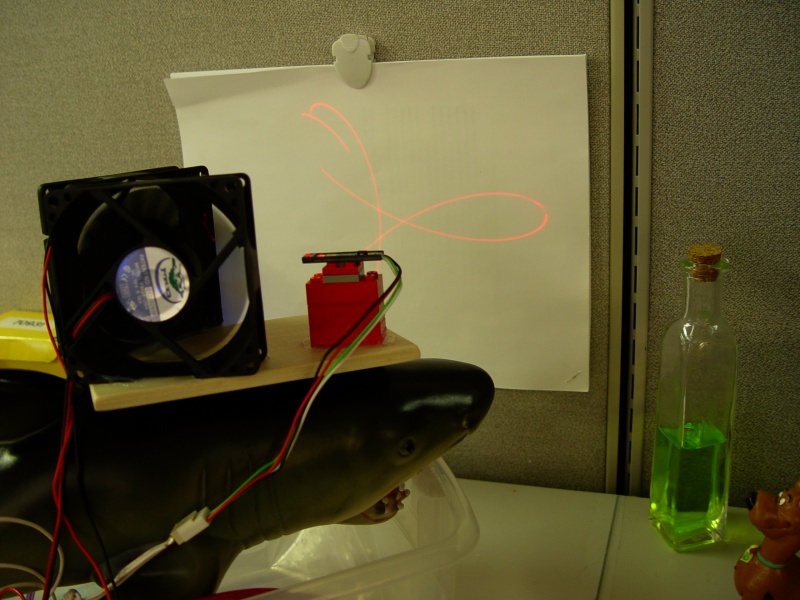
I created this display for the 555 timer contest, a compact art piece that cries out in appreciation of the venerable 555 timer. It’s a persistence of vision display formed by 7 blue leds and 3 NE555 timers, which spells out 5 5 5 as it revolves.

Theory of Operation

  • The first 555 is setup as an astable oscillator, with the reset triggered by the tachometer output of the PC fan that the whole thing is mounted on. This timer generates the ‘horizontal’ parts of the 5.
  • The second 555 is positive edge triggered (using a transistor NOT and a capacitor to generate the level input the 555 wants), and generates the *right* edge of the 5 (kind of counter-intuitive, but it spins counterclockwise).
  • The third 555 is negative edge triggered (capacitor filter) and generates the left edge of the 5.
  • Three 5’s are created by tuning the first astable 555’s period to complete 3 cycles in 1/4 of a revolution (the tachometer is high for 1/4 rev, low for 1/4, high for 1/4, low for 1/4, so you get two copies per full revolution).
Persistence of vision display using 555 timers

The original writeup for the compo is still available at http://auia.net/timercompo/pov555entry.html.

Aether converter cell

I was thinking of doing something Steampunk themed for Halloween, and thought I might spend a few hours prototyping a ‘raygun’ prop.  This aether cell as far as I got, it would serve as the ‘ammo cartridge’ for the raygun, sticking out of the back at a slight angle.

It’s got a red LED, a cyan ultrabright, and a UV LED, and the fluid is a mixture of diet tonic water, vodka, and highlighter fluid, so you get a very nice eerie glow with the UV LED on.

Aether converter cell in action

One reason I didn’t go further is because Mighty Putty sucks.  I had purchased some on sale at Target because it’s supposed to be waterproof, but it certainly didn’t form a watertight seal against my brass coupling and I’m glad I tried it here and not in an emergency plumbing situation!  It also smells incredibly foul, far worse than other epoxies I’ve used.

Another thing I’d try differently next time is to omit the highlighter fluid.  It does glow brightly, but it’s fairly opaque as well, making the mix look cloudy with the LEDs off and I think it limits how far the UV can travel too much.

Aether converter cell in action
Mounting LED + crystal
Testing crystal positioning
Red LED on

Robotender Mk. 1

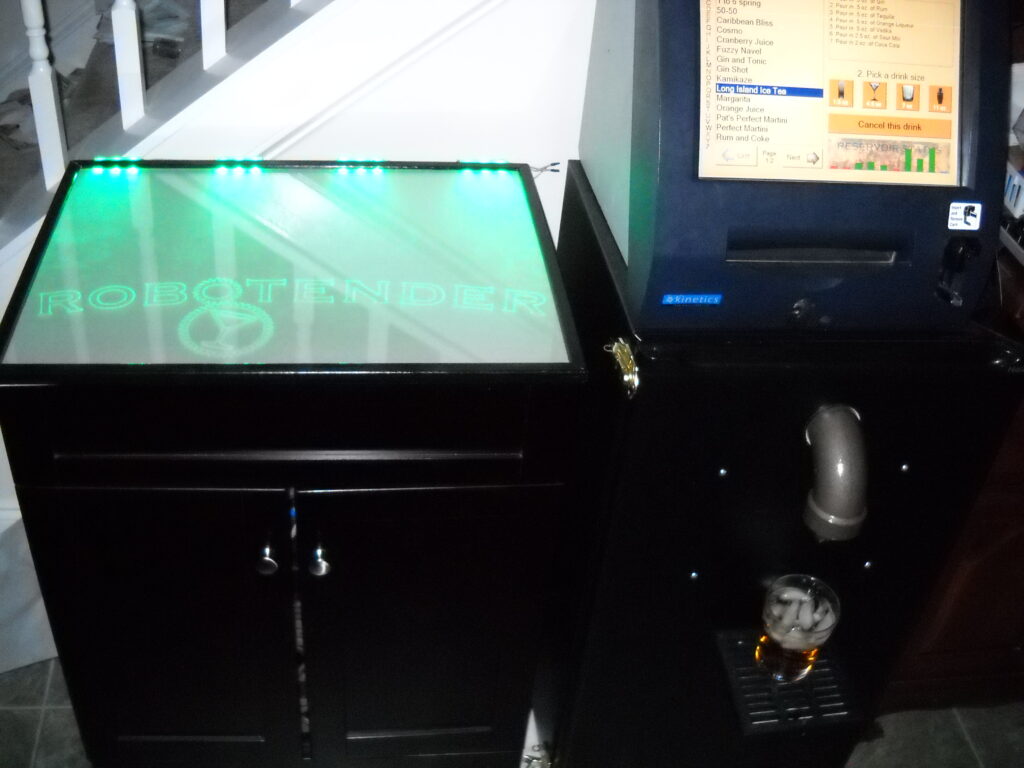
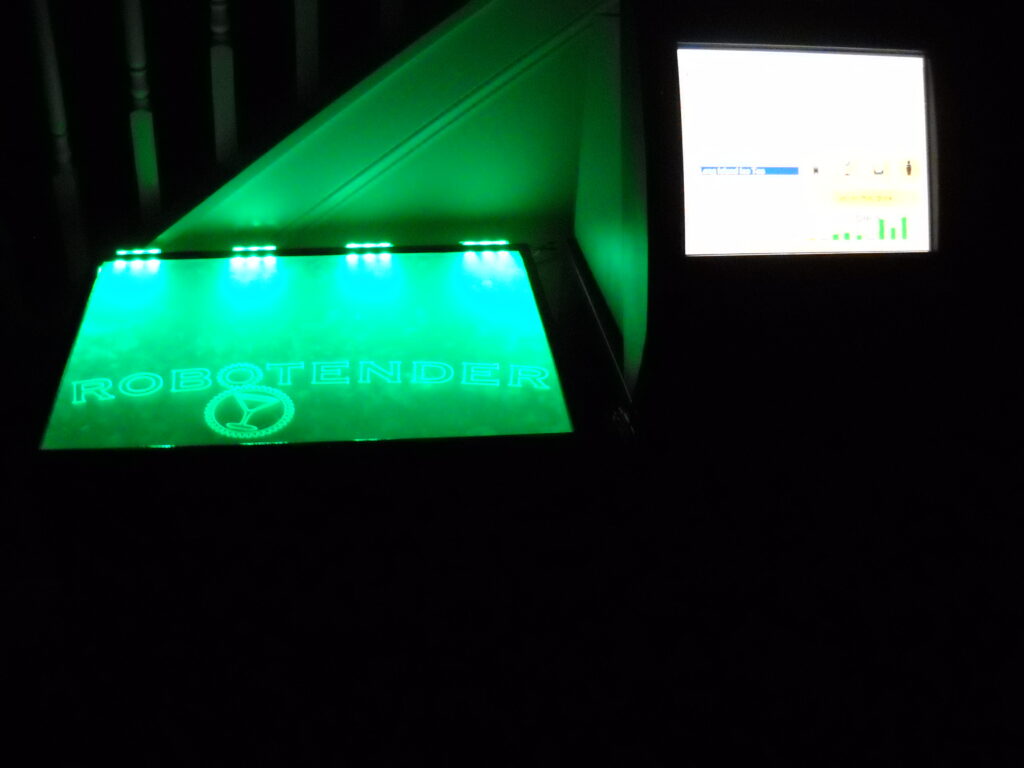
Robotender is a robotic bartender. It can mix any quantity of 9 different liquids together to make a wide range of drinks. The touch screen allows a recipe and drink size to be selected and it will then be poured. If a recipe contains any ingredients that aren’t currently loaded into a reservoir, the screen will instruct you to pour that one in manually. One of the most enjoyable drinks to pour is a Long Island Ice Tea, which causes 5 reservoirs to activate in quick succession, and only needs to be topped off with a touch of Cola for color.

The system works with a set of pressurized reservoirs and electronically controlled solenoid valves.  When a valve is activated, the pressure forces the liquid out and into the glass.

Conceived of many years ago and built in the fall of 2008.

Full system test (Dec 4th)

How to supress Warning LNK4099 – PDB ‘XXX’ was not found

When a library is compiled in MSVC with PDB support, but later distributed without the correct PDBs, anyone attempting to link with the library will get many warnings of the form:

warning LNK4099: PDB 'XXX' was not found with 'YYY' or at 'ZZZ'; 
linking object as if no debug info

You might think that it’s not a big deal: recompile the library to not use PDB files, or disable the warning. The former option isn’t available if it’s a 3rd party SDK without source code, and the latter option isn’t possible (more on that in a second).

At least in Visual Studio 2003 (7.1) and Visual Studio 2005 (8.0), 4099 is on a ‘non-ignorable’ warning list. This means that you can’t use /ignore in the linker command line options to get rid of it, brilliant! This is by design [1] and they don’t care enough to provide any other mechanism right now [2]. To be fair, both the /ignore switch and which warnings are non-ignorable seem to be undocumented, but someone else has made a handy list of them [3].

Now, you could probably live with it if there was just one warning per-library and you don’t really care about compiling with 0 warnings, but it’s typically hundreds of warnings, and we all know how slow VC80 gets when you spam the output window. So, since there is no sanctioned workaround, let’s do this the hard way.

How to disable the warning by patching your linker

The following are instructions that I wrote up for some friends in this situation, only tested on VC8, but it should apply to VC7.1 or VC9 as well.  Yes, I really am proposing that you patch your linker to ensure a clean build. If it helps you sleep at night, think of it as correcting a profound oversight by Microsoft. There just isn’t any other solution if you want to compile in debug mode against libraries you don’t have source for that were incorrectly configured.

You could go after the code that generates a 4099 and prevent it from ever getting generated, or the code that prevents it from being ignored. The second path is quite easy, there is a whole list of non-ignorable warnings which makes it trivial to correctly identify the list within the linker executable.

Fire up your favorite hex editor on link.exe (likely the one in “C:\Program Files\Microsoft Visual Studio 8\VC\bin”) and look for 4099 at 32 bits wide. The very first hit also has 4088 before it, and 4105 after it, bingo! I set it to 65535; pick your poison, but you probably want to avoid the 4xxx range. Hooray for no more annoying PDB warnings, at least until the next VS SP or VC9.

The usual caveats apply when modifying executables (Make a backup copy, validate what you’re attempting to change, no warranty express or implied, etc…). If you have a newer or older link.exe, the list of unignorable warnings may be different, or stored differently, so verify that the value you’re replacing is sane:

... F8 0F 00 00 - 03 10 00 00 - 09 10 00 00 ... (4088, 4099, 4105)

Once done, you can add /ignore:4099 to your linker options and it will actually work.

EBE Promotional Video

This was a project at CHIL, showing a before and after vision of EBE for the For All We Call Mizzou Fundraising campaign.

https://www.youtube.com/watch?v=9TapPZN6b5Q

I modeled the engineering buildings as they currently are in GTK radiant, added them to an existing Q3A map of the west campus, and constructed a fly-through video for an engineering fundraiser.

Nathan and Zach constructed our idea of what the new engineering east could look like in Maya, and we composited the videos together as a before-and-after comparison to create the final video.

Reverse-engineering the WMB Prototcol

I took a graduate networking class and for my project, I decided to reverse-engineer the DS download play protocol (commonly referred to as Wireless Multi-Boot, due to ideological similarities with the GBA Multi-Boot feature).  This is the protocol underlying the ability for wirelessly transferring demos from a download station or another DS to your own DS.  Many games have the ability to transfer demos of the full game, or multiplayer clients for LAN gaming, and the kiosks are used in stores and at conferences to distribute game demos.

The project title was ‘Inferring a Proprietary Wireless L3 Protocol From Packet Traces’, and I gave a presentation in class, as well as a project report that had the technical details.  I’ve since placed all of that information on the NDSTech wiki.

Note: I was not the first person to do this.  FireFly did everything that I did first, but he did not publish any information on the protocol or source code for his tools.  However, his raw-mode driver for Ralink cards and the already re-assembled WMB captures made my life a whole lot easier.  A number of other people on the gbadev.org forums also provided vital insight (to both FireFly and myself).

3D Medical Consultation

An introduction to the project is available here.

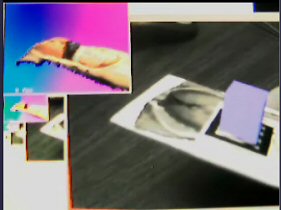
I am developing a person-portable telepresence device using a PDA. Max Smolens wrote the original PDA client/server code, designed for the HiBall trackers. Since Max graduated, I’ve taken over the code base and converted it to track a fiducial marker with a greyscale camera, eliminating the need for the HiBall infrastructure. The two-handed interaction with patient surrogate and PDA has proven quite useful. I also spent a few months working with inertial measuring units and learning about tracking and filtering.

Future research directions include studying the effectiveness of the user interface and how many tracked degrees of freedom are really necessary in this application, and making the surrogate active in tracking, perhaps via five sequenced IR LEDs or magnetics.

A WMV encoded movie of the PDA system in action is available here.

Update: Some of the interaction research went on to be published at IEEE VR 2007.

NDS Homebrew SDK

The Nintendo DS is the newest handheld console from Nintendo, released in the U.S. in November, 2004. In general, console manufacturers do not support independent development (homebrew), and the DS is no exception. Everything must be reverse engineered and documented, and free headers, libraries, and tools created

I have been involved in the community since before launch and have made significant contributions to making homebrew on the DS possible.  I co-authored the first homebrew development library ndslib with Jason Rogers (dovoto), which provides startup files, link scripts, and a library of functions to utilize the DS hardware.  The library was renamed to libnds when it merged repositories with devkitpro, and I continue to maintain and contribute to it there.  I also maintain the NDSTech Wiki (posting as Joat), a central repository for all homebrew knowledge about the Nintendo DS.

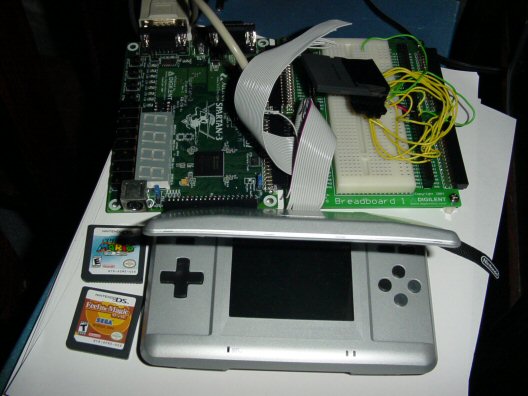
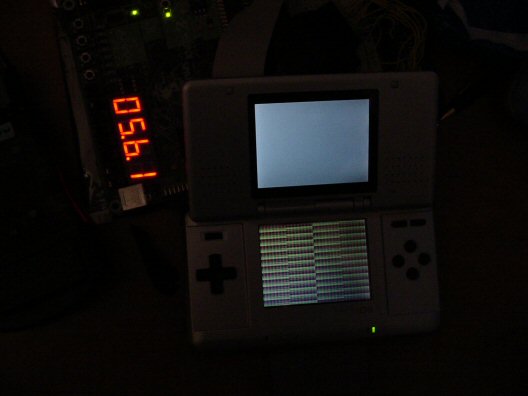
Below are a few pictures of my early development environment.

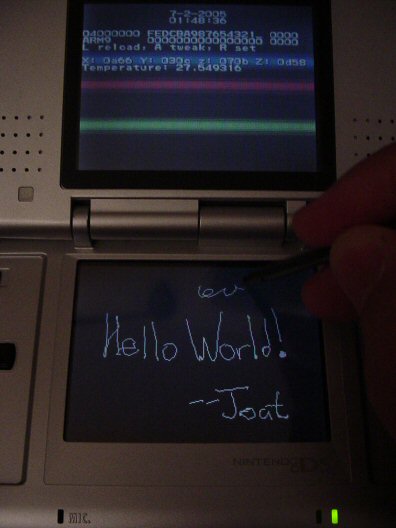
First homebrew use of the touch screen
My passthrough unit, which enables me to bypass the normal boot sequence and execute code in DS mode from a GBA cartridge.
First visual test. Everything before this was non-visual code dumping registers and probing memory. The count shows the number of command transactions observed on the DS bus (in hex).