I spent some time last weekend prepping for #cgajam by playing around with different materials / effects to constrain a UE4 game to CGA colors, and came up with a drop-in post processing BP.
How to use
Download the template (requires Unreal Engine 4.16, licensed as CC0) and unzip it. You can either open the project directly and migrate the Content/CGAJam folder into your project or drop the whole folder into the templates directory of your 4.16 installation (e.g., C:\Program Files (x86)\Epic Games\UE_4.16\Templates) and then create a new project (info on how to make a project into a template here).
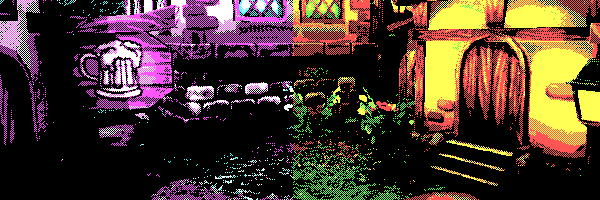
There’s an example map but all of the magic is wrapped up in BP_CGAPostProcess; just drop one into your level and try playing around with the settings to suit your content. You can pick one of the two palettes, adjust how much color-space dithering and screen space dithering there is, and tweak the overall gamma / brightness. For the hand painted environment I found 50% screen dither + 50% LUT dither at level 3 to give me the best results, but for the example scene with solid shapes and color fills, 100% screen dither with no LUT dither looked better.
Implementation details
CGA had a variety of different modes and palettes, but the most memorable for gaming was the 320×200 graphics mode using either palette 0 (black, red, green, yellow) or palette 1 (black, magenta, cyan, white). Color 0 (black) is actually adjustable to any of the 16 CGA colors, though it doesn’t appear to be allowed for #cgajam. The red and green components of colors 1..3 are the same in both palettes as well, only the blue color differs.
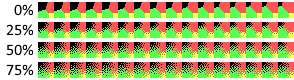
UE4 has a lookup-table texture (LUT) based color grading system, but there’s no way to control the filtering used to sample it, so it can’t produce ‘crisp’ CGA colors. It’s still useful to get colors to nearly the right place though. I’ve included 4 LUT textures for each palette with varying color-space dithering (0%, 25%, 50%, 75%); you can adjust the strength of the color grading as well to vary the effect.
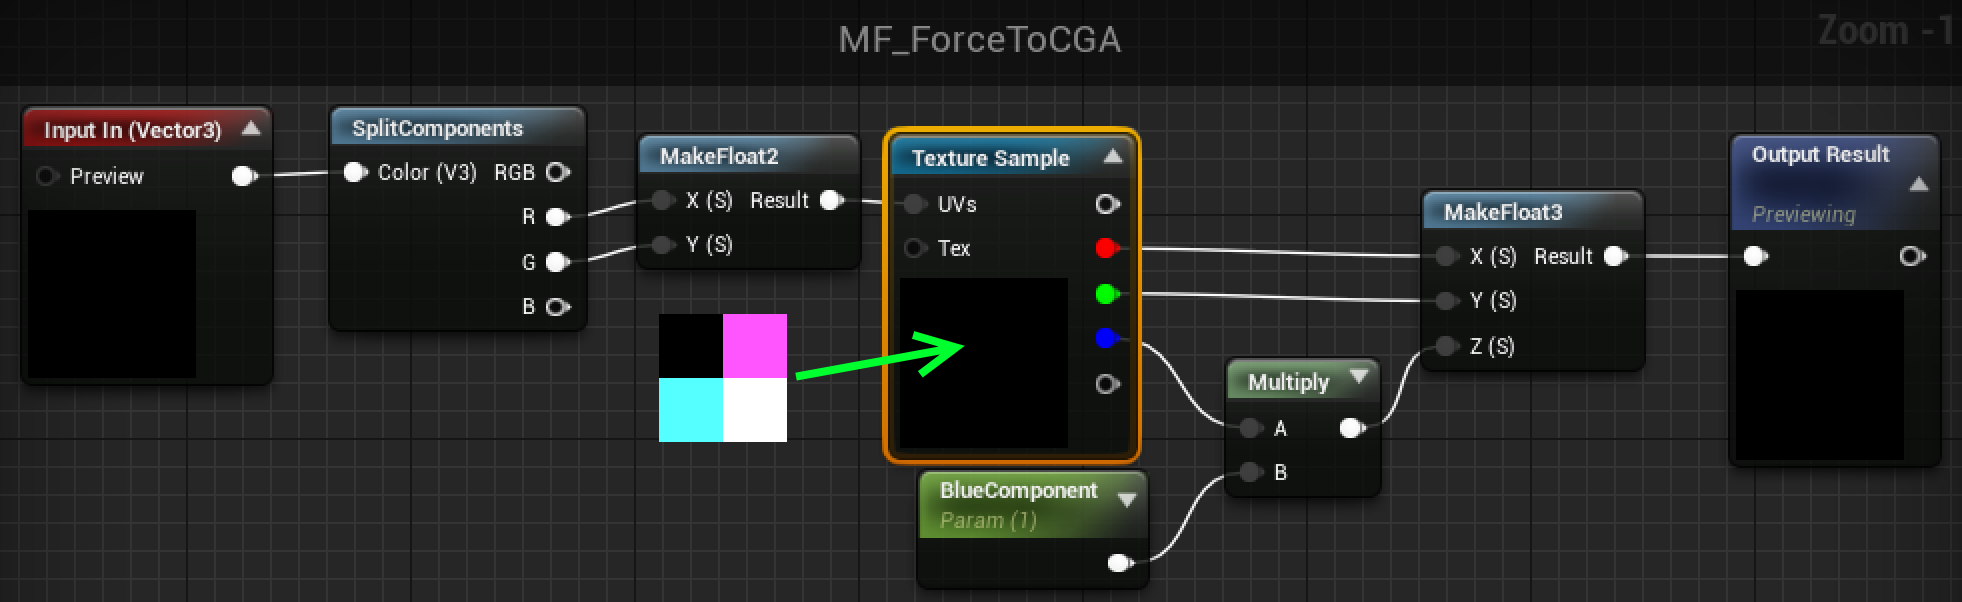
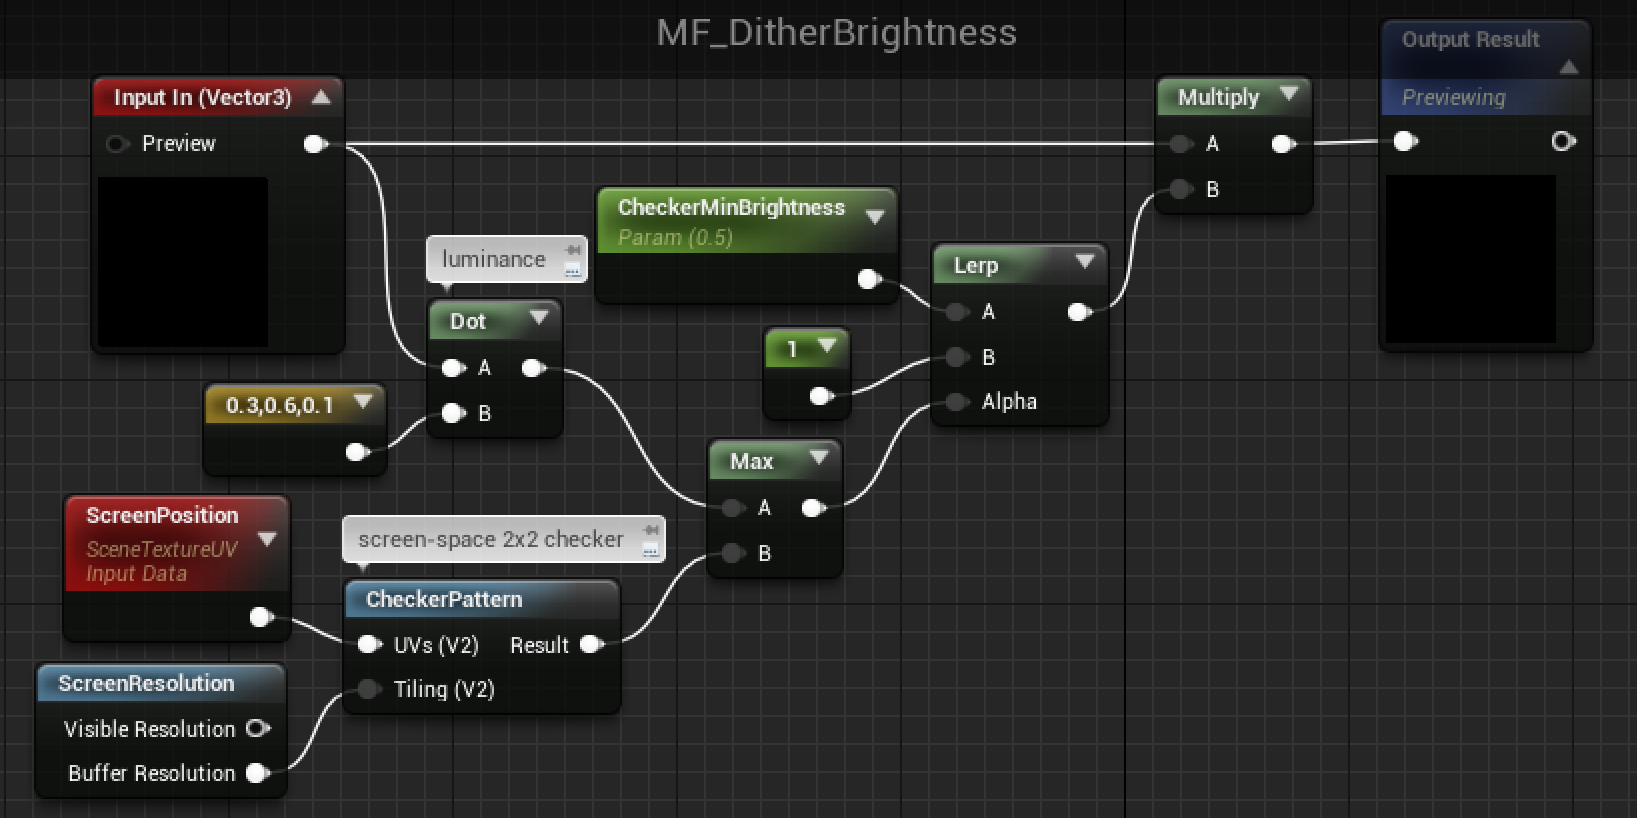
The post-process material (M_ForceCGA_PostProcess) has a screen-space dither pattern which dims based on brightness prior to matching to one of the four colors in the active palette. The color matching (MF_ForceToCGA) and dithering (MF_DitherBrightness) are split up into separate material functions to make them easier to reuse, e.g., in the UI material.
The actual color matching is done using a cheap lookup texture with red->U and green->V (the 2×2 texture is set to uncompressed, clamped instead of wrapped uvs, nearest filtering, etc… to give us a clean and exact output value). We can ignore the input blue entirely as mentioned above, and multiply the output blue with the correct value for the current palette (dim it for palette 0 and keep it as-is for palette 1).
User Interface
For the UI, you’ve got two options:
- Stick with the CGA colors, which need to be specified differently in the UI than in the world since UI happens in a different color space, e.g., yellow is (1,1,0.092) instead of (1,1,0.333) (the correct final color will show up in the hex sRGB setting of the color picker).
- Get in the right ballpark and use a retainer box with the Effect Material set to MI_ForceCGA_UI_Palette0 or MI_ForceCGA_UI_Palette1 to guarantee that you only use the correct 4 colors (recommended approach).
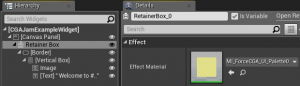
Using a retainer box

Avoiding flickering artifacts
There are a couple of steps in the default UE4 post-processing chain that introduce temporal artifacts in order to improve overall image quality when doing realistic rendering. These steps become very noticeable and objectionable when you do something like threshold down to 4 colors, so the example project disables them (setting r.Tonemapper.GrainQuantization to 0 and disabling post-process Anti-aliasing entirely, though you could also switch from temporal AA to FXAA instead). The DefaultEngine.ini changes to do this won’t transfer over if you just migrate the content from one project to another, so you may need to paste in:
[/Script/Engine.RendererSettings] r.DefaultFeature.AntiAliasing=0 [SystemSettings] r.Tonemapper.GrainQuantization=0 |
Resolution
Want a lower resolution that is a bit more like true CGA 320×200? Adjust the Screen Percentage on the post process component and set r.upscale.quality to 0 (nearest filtering) in the [SystemSettings] section of DefaultEngine.ini
Ideas for further improvement
Try combining it with an edge detection material (either on depth or on custom stencil if you want to limit the effect to foreground objects) to put black outlines around things.
Try other spatial variation patterns besides a 2×2 checkerboard; techniques like Real-time hatching would probably work quite well.
Credits
The map used in the example shots is from the “Hand Painted Environment” marketplace pack by Evgeniya Yaremko.